As most of you know, the Mr. and I moved into our new house back in February. While I have loved making our house a home, there have been some challenges along the way. One of the struggles I've had is that I get an image of exactly what kind of decoration I want in my mind for a particular space, and then I can't find it. This was the case in our dining room for a center piece. So I brought an idea to my handy husband, and we made our own!
DIY Homemade Centerpiece
When we picked out our lighting, we chose this large, rustic chandelier, and my struggle was that I wanted something for the table that was about as long as the light, but that was still short enough height wise, that there was plenty of space between the two.
{As you can see, I'm also having a hard time finding the perfect piece of art to grace our dining room wall!} DIY Homemade Centerpiece
Boards {we used pine}
Saw {or have the hardware store cut them to your measurements}
Tape measure
Sander {or sand paper}
Finishing nails
Hammer
Stain and rag
Mason jars and flowers of your choice
Hardware for the sides
The best part of making this by ourselves {besides getting to spend time together} is that it honestly took us about than an hour!!!
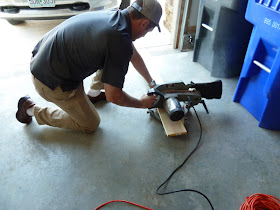
Chris cut the boards,
I sanded them,
I wanted it to be a very dark brown, so we went with Rust-Oleum Ultimate Wood Stain in Kona.
After the stain was dry, he screwed on the handles that we bought,
and then I got busy deciding what to fill it with! I already had several mason jars, and they were the perfect height for the box. {The box ended up measuring 3 feet in length, 7 inches in width and 5 1/2 inches in height.}
I used six of them for little vases.
I used big, cream hydrangeas for the flowers. {If you watch for sales, you can get them buy one get one free at Michaels Craft store!}
And that's it!
The other thing I love about this is that we spent less than $40 dollars on all of the supplies. I asked a few people and they thought if you were to buy this in a store it would cost well over $100. :) Now we have a unique piece that we love, we saved money and got to do something together. I love DIY projects!


This is so perfect for that space. PS - I love the lighting fixture there too. Love, love this! I love doing DIY projects with my husband, great way to spend time together!
ReplyDeleteGreat job! It looks amazing and I love those handles!
ReplyDeletethis is beautiful, stephanie! and it all looks great together!
ReplyDeleteThis is stunning!! It looks like you bought it at a high end home decor store! I may have to steal this idea!;) thanks for sharing!
ReplyDeleteThat is fabulous and so beautiful! Simple yet elegant and I really love it. Let me pin this up to my Christmas table decorations Pinterest board as they also suggest festivities and holiday. Cheers!
ReplyDeleteThat looks so stunning. I love the freshness and relaxing atmosphere it gives. I feel so refreshed just my seeing on it. That is one of the best Christmas table decorations I've seen. Thanks for the inspiration.
ReplyDelete